
how to remove rust from car wheel wells comes down to two things: figuring out whether you’re dealing with light surface rust or deeper corrosion, then treating it in a way that stops moisture and salt from coming right back.
If you’ve noticed bubbling paint, flaky metal around the arch, or a crunchy edge under the lip, don’t wait for “next weekend.” Wheel wells get hammered by road salt, sand, and trapped mud, so rust tends to spread faster here than on flatter body panels.
This guide walks you through realistic DIY options, what tools matter, where people waste time, and when it’s smarter to involve a body shop so you don’t turn a small repair into a repaint.
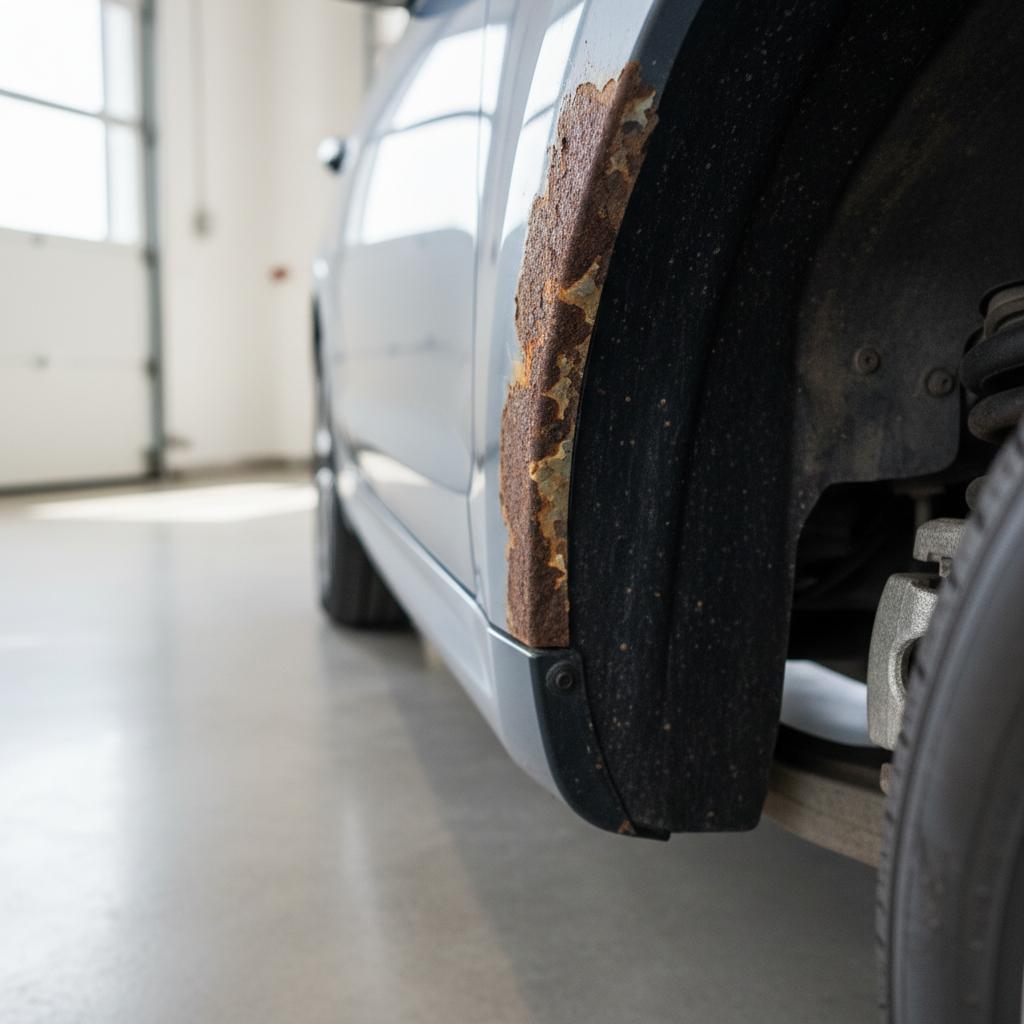
Why wheel wells rust so easily (and why it keeps coming back)
Wheel wells are basically a rust incubator: water gets thrown upward, grit scuffs coatings, and everything stays damp longer than you think.
- Road salt and brine sit in seams and pinch welds, accelerating corrosion in many northern states.
- Plastic liners trap debris behind them, so the metal stays wet even when the outside looks dry.
- Chipped paint and undercoating exposes bare steel, and the fender lip is a common impact zone.
- Seams and spot-welds hold moisture, and rust often starts between layers where you can’t see it yet.
According to NHTSA, corrosion can affect vehicle safety components and should be addressed when it impacts structural areas. Wheel wells sit near suspension mounts and rocker areas, so it’s not just cosmetic in every case.
Quick rust check: surface rust vs. scale vs. holes
Before you buy products, do a quick classification. It changes the whole plan, and it helps you avoid “painting over a problem.”
3-minute inspection checklist
- Orange staining, metal still smooth: usually surface rust, often DIY-friendly.
- Flaking layers and rough scabs: scale rust, needs aggressive removal and likely filler/primer work.
- Soft spots, pinholes, crumbling edges: perforation, often needs welding/patch panels or panel replacement.
- Rust at seams under seam sealer: can hide deeper corrosion behind the visible area.
A simple test: tap suspicious areas gently with a screwdriver handle. Solid metal rings and feels firm, bad metal sounds dull and may flex.
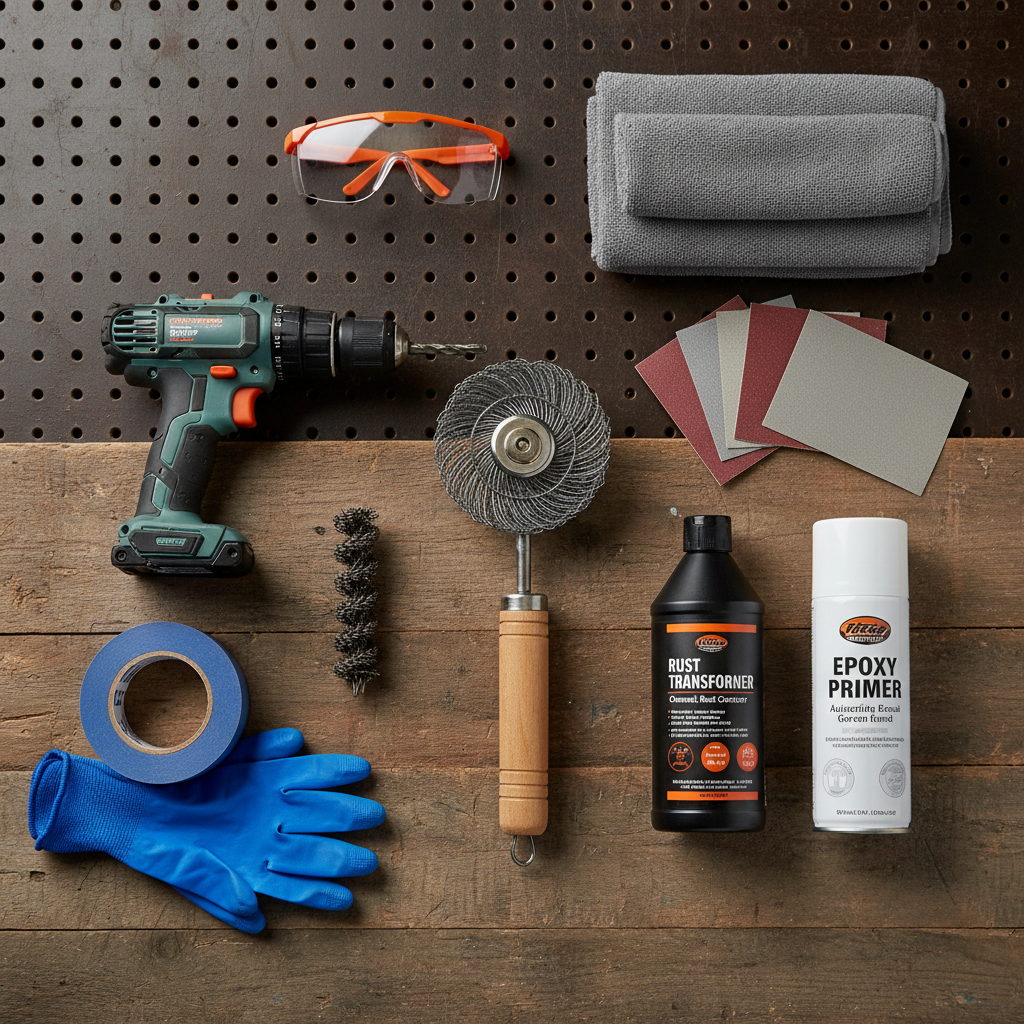
Tools and materials that actually matter
You can do a decent wheel-well rust job with basic tools, but a few items make the difference between “looks good for a month” and “holds up through winter.”
- PPE: safety glasses, gloves, and a respirator rated for paint/organic vapors if you spray coatings.
- Cleaning: degreaser, car shampoo, microfiber, and a rinse source.
- Removal: wire brush, sandpaper (80/120/220 grit), or a drill with a wire cup wheel.
- Chemical help: rust remover gel or rust converter (for what you can’t fully sand clean).
- Coatings: epoxy primer if available, then paint, then a wheel-well coating or underbody coating.
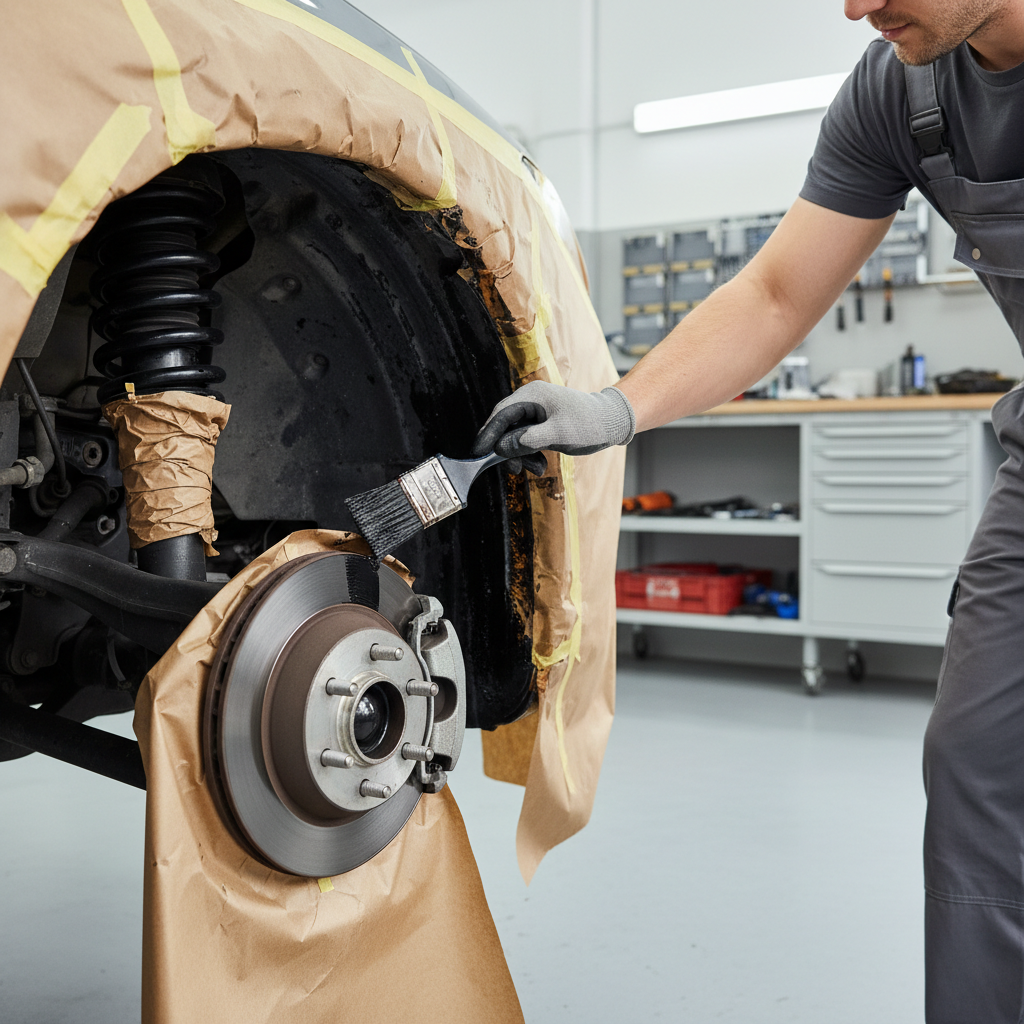
- Masking: painter’s tape, plastic sheeting, and cardboard shields for brakes and suspension parts.
One realistic note: if you only have rattle cans, you can still get a solid result, but surface prep has to be better because the coating film is thinner.
Step-by-step: how to remove rust from car wheel wells (DIY workflow)
If your rust is mostly surface to moderate scale, this is the process that tends to hold up. Don’t rush the dry times, that’s where many DIY jobs fail.
1) Wash, decontaminate, and dry completely
- Remove the wheel if you can do so safely, it improves access and results.
- Rinse hard, then wash with shampoo, then use degreaser on oily spots.
- Let the area dry fully, trapped water ruins adhesion.
2) Pull the liner back (when possible)
Many wheel wells have plastic liners held by clips or screws. You often don’t need to remove it entirely, just open enough to clear out packed dirt and see the lip and inner edge.
- Clear mud and leaves, then rinse again.
- Look for rust trails at seams, those usually mean moisture sits there.
3) Mechanically remove what you can
Your goal is bare, solid metal or at least firmly bonded metal. Loose rust must go, even if it takes time.
- Use 80 grit or a wire wheel for heavy areas, then refine with 120–220 grit.
- Feather the paint edge around the rust so you don’t leave a hard ridge.
- Vacuum and wipe dust off between passes.
4) Treat remaining rust you can’t reach
If tiny pits or seams still show discoloration, a rust converter can help stabilize it. Follow the label closely; some products want bare rust, others want clean metal with light rust remaining.
According to EPA guidance on safer chemical use, you should follow the product’s safety instructions and ensure good ventilation, especially with solvents and coatings.
5) Prime, paint, then protect
- Prime: epoxy primer is a strong option for corrosion resistance; otherwise use a quality automotive primer suited to your topcoat.
- Paint: match body color only if the area is visible; many wheel wells can be finished in satin black for practicality.
- Seal: apply wheel-well coating or undercoating once paint cures enough, focusing on impact zones.
If you’re repainting a visible fender lip, plan for blending into adjacent paint. That’s where DIY can look “almost right,” even when rust protection is fine.
Choosing the right approach: a simple options table
This is the “don’t overbuy, don’t under-fix” part. Use it to pick a method that fits what you see.
| Rust level | What it looks like | DIY approach | What to avoid |
|---|---|---|---|
| Light surface rust | Orange haze, no flaking | Sand/brush + primer + coating | Painting without sanding |
| Moderate scale | Flakes, rough patches | Aggressive removal + converter (if needed) + epoxy primer | Undercoating over loose rust |
| Perforation/holes | Pinhole, soft metal, crumbling lip | Temporary stabilization only | Filler as a “structural fix” |
| Seam rust spreading | Rust lines at seams, under sealer | Open seam if possible + treat + reseal | Covering without addressing moisture path |
Common mistakes that make rust return
Most “rust came back” stories aren’t because products don’t work, they’re because prep and sealing didn’t match the situation.
- Skipping liner cleanup: if mud stays packed behind the liner, moisture keeps feeding corrosion.
- Undercoating over active rust: it hides the problem while it grows underneath.
- No feathering: leaving a sharp paint edge invites peeling and water intrusion.
- Rushing cure times: coating too soon traps solvent or moisture, adhesion suffers.
- Ignoring seams: the visible patch looks fixed, but the seam continues rusting from inside.
Key takeaway: removing rust is only half the job, the other half is blocking water and salt from re-entering the same spot.
When it’s smarter to get professional help
DIY is great for surface rust, but there are lines you don’t want to cross casually.
- Any holes in metal near rocker panels, strut towers, or suspension mounting points.
- Rust spreading under paint across a wide area, especially on a newer vehicle you want to keep long-term.
- Airbag or sensor wiring routed through the area, since overspray and abrasion can cause issues.
- Lease returns or resale goals where paint match and finish quality matter.
A reputable body shop can cut out rot, weld patches, and refinish properly. If you’re unsure whether the metal is structural, a professional inspection is a reasonable next step.
Practical maintenance to keep wheel-well rust from coming back
Once you learn how to remove rust from car wheel wells, prevention becomes the cheaper habit that saves the next repair.
- Rinse wheel wells in winter after storms, even a quick self-serve wash helps.
- Clean behind liners once or twice a year if your area has heavy salt or coastal air.
- Touch up chips quickly on the fender lip, that edge gets sandblasted by tires.
- Re-check after 4–6 weeks to catch small failures before they spread.
If you want a simple routine, put it on the same schedule as tire rotations, you’re already looking at the area anyway.
Conclusion: the goal isn’t “perfect,” it’s stopping the cycle
If your main problem is early corrosion, how to remove rust from car wheel wells is mostly about cleaning deeper than you think, removing loose material aggressively, then sealing with a primer-and-protect stack that fits the exposure.
Pick one action you can do this week: pull one liner back and clean it out, or sand and prime one small patch properly. Small wins matter here, because rust rarely stays small on its own.
FAQ
- Can I just spray undercoating over rust in a wheel well?
In many cases it’s a short-term cover-up. If rust is active or flaky, undercoating can trap moisture and hide progression. Remove loose corrosion first, then coat. - What if I only see rust on the fender lip?
That’s often where chips start. Sand back to solid material, feather the paint edge, prime, then protect the inner lip. Also check behind the liner, rust sometimes starts there first. - Is rust converter enough for wheel wells?
Converters can help with small pits or areas you can’t fully sand, but they still need proper topcoats. Think of converter as a prep step, not the final protection layer. - How long should I wait before driving after coating a wheel well?
It depends on product cure times, temperature, and humidity. Many coatings feel dry quickly but cure slower. Follow the label, and avoid wet roads until you have decent cure. - Do I need to remove the wheel to do this job?
Not always, but access improves a lot and results are usually cleaner. If you can’t remove it safely, turn the steering to open up space and mask carefully. - How do I know if rust is structural?
If metal is soft, perforated, or near key mounting points, treat it as potentially structural. When in doubt, a body shop inspection is worth it, especially for safety-critical areas. - Will washing my car prevent wheel-well rust?
Regular washing helps, but wheel wells need targeted rinsing, especially in salted regions. The biggest difference comes from flushing out packed debris behind liners.
If you’re working on recurring wheel-well rust and want a more predictable result, a detail-oriented process with the right prep materials, coatings, and masking plan can save you time and rework, especially when winter salt is part of your reality.