
how to clean corroded battery terminals is usually a straightforward job, but it goes sideways fast when people skip safety steps or clean the “wrong” white crust in the wrong way.
If your car cranks slow, clicks, or your dash lights act weird, corrosion at the posts can add resistance and starve the starter of power, even when the battery itself still has life. The good news, most cases respond well to basic cleaning and better reassembly.
What this guide does is keep it practical: what causes the corrosion, how to tell if you’re dealing with minor buildup or a bigger electrical issue, and a step-by-step process you can do in a driveway without turning it into a chemistry project.
Why battery terminals corrode (and why it matters)
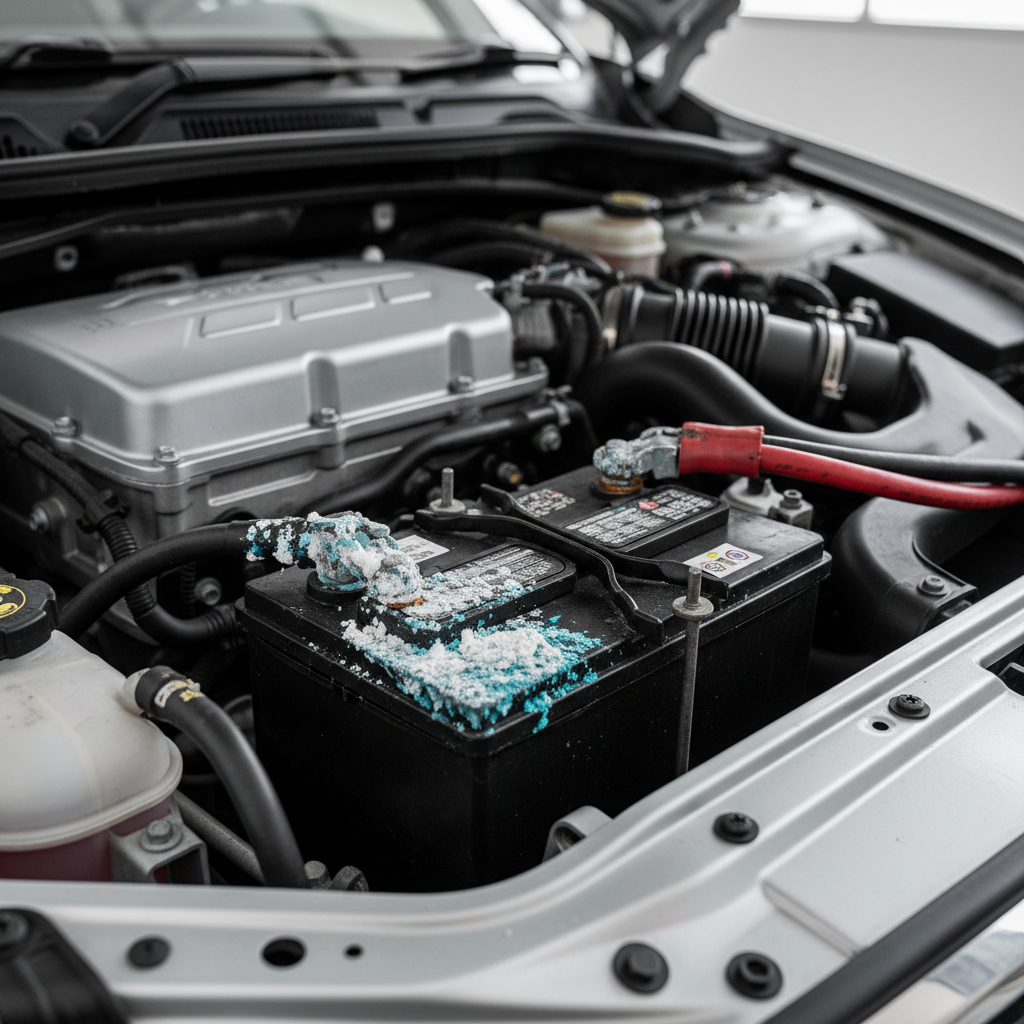
Most terminal corrosion is a chemical reaction around the posts where battery acid vapor, moisture, and metal meet. It can look like fluffy white powder, crusty tan deposits, or blue-green buildup on copper parts.
- Normal off-gassing: Many lead-acid batteries vent small amounts of hydrogen and acid mist, especially when charging.
- Loose connections: A slightly loose clamp can arc microscopically, accelerating oxidation and crust formation.
- Overcharging or charging issues: A failing alternator regulator or the wrong charger setting may increase gassing, which often means faster corrosion.
- Battery age or case seepage: As batteries get older, seals can degrade, letting electrolyte creep out near posts.
Why it matters: corrosion adds electrical resistance, and high-current systems (starting, charging) hate resistance. That’s why you can get “random” no-starts or voltage dips that disappear after a jump.
Quick self-check: is this DIY-cleanable or a bigger problem?
Before you grab baking soda, check what you’re actually seeing and how the car behaves. This saves you from cleaning terminals when the real issue is a dying battery, cracked cable, or charging fault.
Fast checklist
- Likely DIY: crust only on the terminal tops/clamps, cables feel solid, battery case looks dry, car starts normally after cleaning.
- Proceed with caution: corrosion runs down into the cable insulation, terminals feel hot after driving, clamps won’t tighten securely.
- Get help soon: swollen battery case, electrolyte wetness, rotten-egg smell, repeated corrosion within weeks, or frequent dead battery.
According to the National Highway Traffic Safety Administration (NHTSA), battery acid is corrosive and can burn skin and eyes, so treat any wetness or heavy buildup as a safety issue, not just a cosmetic one.
Tools and supplies you’ll want (and what to skip)
Most people already have what they need. The key is using tools that clean metal well without spreading corrosion into places you can’t see.
- Safety gear: nitrile gloves, safety glasses
- Cleaning: baking soda, water, small cup/spray bottle
- Scrubbing: battery terminal brush or old toothbrush, small wire brush
- Wrench: usually 10mm for many vehicles, but check yours
- Protection: petroleum jelly or a dedicated battery terminal protectant spray
- Optional: terminal puller (if clamps are stuck), dielectric grease (for outside of connection only)
Skip household vinegar for this job in most cases. It can dissolve some deposits, but baking-soda neutralization is the more common approach around lead-acid residue, and it’s easier to control and rinse.

Step-by-step: how to clean corroded battery terminals safely
how to clean corroded battery terminals comes down to three ideas: disconnect safely, neutralize and remove buildup, then reconnect with clean metal-to-metal contact.
1) Power down and set up safely
- Turn the car off, remove the key, and wait a minute for modules to sleep.
- Work in a ventilated area, keep sparks and cigarettes far away.
- If you have a memory saver and you know how to use it, this is where it can help, but it’s optional for most drivers.
2) Disconnect the battery in the right order
- Negative (–) off first, then positive (+). This reduces the chance of shorting your wrench to metal.
- Move cables aside so they can’t spring back onto the posts.
3) Neutralize corrosion and loosen the crust
- Mix about 1 tablespoon baking soda into 1 cup of water.
- Apply to corroded areas with a brush or careful pour. Light fizzing is normal.
- Let it sit 1–2 minutes, then scrub.
If you see heavy, chunky buildup, go slow. You’re trying to remove corrosion, not grind away the lead post or deform the clamp.
4) Scrub posts and clamps until metal contact is clean
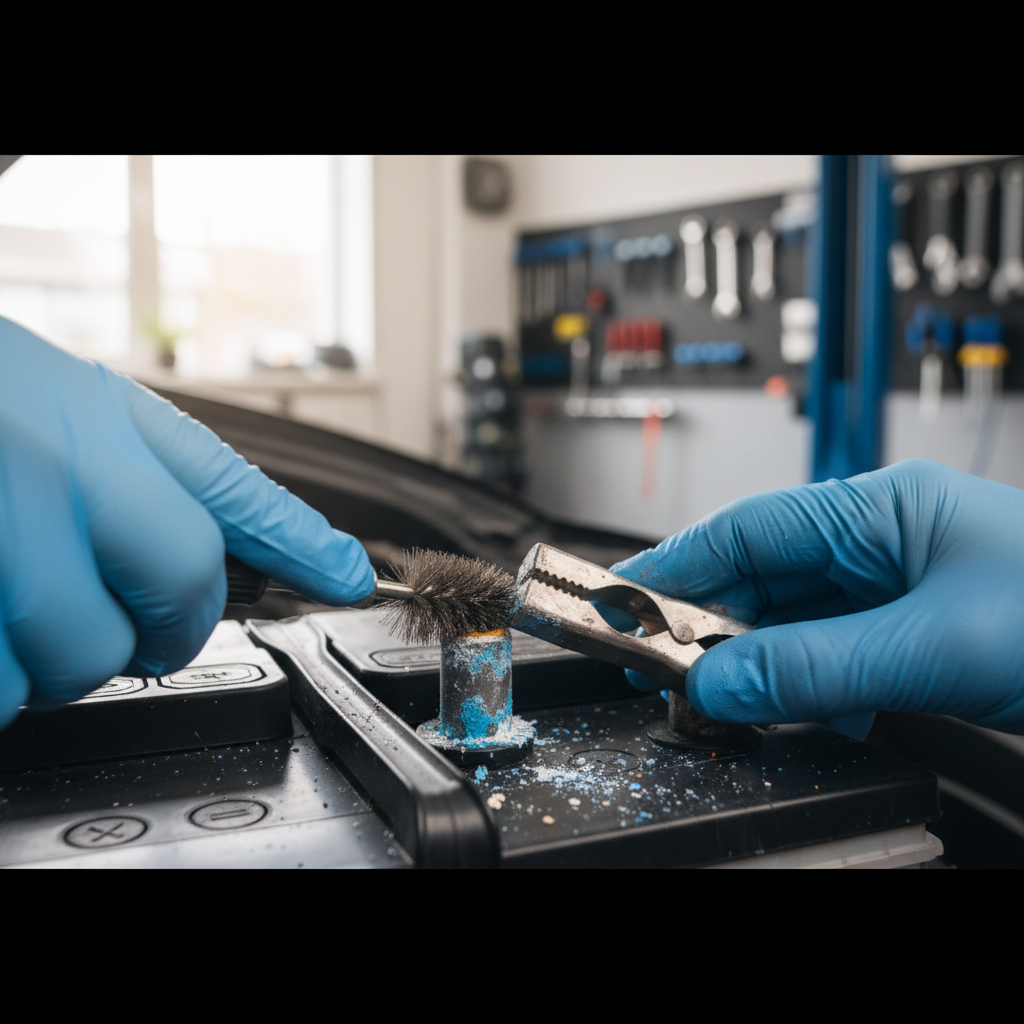
- Use a terminal brush for the posts and the inside of the clamps.
- Use a toothbrush for tight areas around the battery top.
- Wipe away slurry with a disposable towel.
5) Rinse lightly and dry
- Use a damp cloth or a small amount of clean water to remove baking-soda residue.
- Dry thoroughly. Moisture left behind can speed up the next round of corrosion.
6) Reconnect and protect
- Positive (+) on first, then negative (–).
- Tighten firmly so the clamp doesn’t twist by hand, but avoid over-tightening.
- Apply a thin film of petroleum jelly or terminal protectant on the outside surfaces after tightening.
According to OSHA, batteries can produce explosive hydrogen gas during charging, so avoid creating sparks near the battery and keep metal tools controlled while reconnecting.
Which cleaning method should you use? (Table)
People overthink this part. You’re mainly choosing between “neutralize and scrub” vs “replace hardware.” Here’s a simple way to decide.
| Situation | What it usually looks like | Recommended approach |
|---|---|---|
| Light corrosion | Thin white powder on clamp/top of post | Baking soda + brush, then protectant |
| Moderate corrosion | Crust builds around clamp, connection dull/rough | Remove cables, thorough brushing inside clamp, check tightness |
| Severe corrosion into cable | Green/blue creeping under insulation, swollen wire end | Replace cable end or cable assembly, cleaning alone often won’t last |
| Recurring corrosion | Returns quickly after cleaning | Inspect charging system, battery condition, and venting; consider a shop test |
Prevention that actually works (so you’re not cleaning again next month)
how to clean corroded battery terminals is useful, but the win is making it stay clean. Prevention is mostly about connection quality and keeping vapors and moisture off the joint.
- Get the clamp tight enough: if it twists, it’s too loose, and that’s when arcing and corrosion speed up.
- Use terminal protectant: spray or a thin petroleum jelly layer on the outside surfaces after tightening.
- Keep the battery top clean and dry: grime plus moisture can create a mild conductive path that encourages buildup.
- Check hold-down hardware: a battery that shifts can stress posts and loosen clamps.
- Watch for repeat patterns: if buildup returns fast, test the battery and charging system rather than endlessly scrubbing.
Key takeaway: prevention is less about fancy chemicals and more about clean metal contact plus a barrier coating after assembly.
Mistakes that waste time (or create new problems)
A few common missteps make corrosion come back sooner, or worse, damage parts you didn’t mean to touch.
- Disconnecting positive first: increases short risk if your wrench touches body metal.
- Letting baking soda mix seep into vent caps: neutralizer belongs on the outside; avoid flooding the top of the battery.
- Over-tightening clamps: can crack lead posts or deform clamps, leading to poor contact.
- Greasing before tightening: you want metal-to-metal contact first, protection second.
- Ignoring cable damage: if corrosion migrated under insulation, cleaning the outside rarely fixes voltage drop.
When it’s worth getting a professional check
Terminal cleaning is DIY-friendly, but there are moments where a quick diagnostic saves money and stress.
- Car needs frequent jumps or still cranks slow after cleaning
- Battery is more than a few years old and symptoms keep returning
- Visible electrolyte leaks, cracked case, bulging sides, or strong odor
- Cables feel stiff, swollen, or hot near the terminals
Many auto parts stores can test battery and alternator performance. If you’re seeing leaks or damage, a mechanic is the safer bet, since battery handling and disposal have real hazards and regulations.
Conclusion: clean contact now, prevent corrosion later
how to clean corroded battery terminals is mostly about restoring clean electrical contact and then sealing the outside surfaces so moisture and vapor stop feeding the buildup. If you clean thoroughly, reconnect in the correct order, and tighten clamps properly, most starting issues tied to corrosion improve quickly.
If you want a simple next step, do this: clean the posts and clamp interiors until they’re visibly bright, then add a light protectant coating after tightening. If corrosion returns fast or you see cable damage, schedule a battery and charging-system test so you’re not guessing.
FAQ
- Can I clean battery terminals without disconnecting the battery?
It’s possible but not a great idea. You’re much more likely to short a tool or miss corrosion inside the clamp, so disconnecting is the safer, cleaner approach. - Is baking soda safe for a car battery?
On the outside surfaces, yes in most cases. Use a small amount, avoid flooding the battery top, rinse lightly, and dry well so residue doesn’t sit and attract moisture. - Why does corrosion come back so quickly after I clean it?
Often it’s a loose clamp, a battery that vents more than normal, or corrosion traveling inside the cable end. In many cases a charging-system or battery test points you in the right direction. - What if the terminal clamp won’t come off the post?
Don’t pry hard on the battery case. A terminal puller helps, or a shop can remove it without stressing the post, which can crack if forced. - Can terminal corrosion drain my battery overnight?
Corrosion more commonly causes poor charging and voltage drop during starting, not a true overnight drain. If the battery dies overnight, you may have a parasitic draw or a weak battery. - Should I use dielectric grease on battery terminals?
It can help as a moisture barrier on the outside after tightening, but don’t smear it between the clamp and post before assembly. You want direct metal contact where current flows. - Do I need to replace the battery if terminals are corroded?
Not automatically. If the battery tests healthy and there’s no leak or case damage, cleaning and prevention often solves it. Replacement makes more sense when corrosion is paired with age, repeated no-starts, or physical damage.
If you’re dealing with recurring buildup, damaged cable ends, or you just want a more hands-off fix, a quick battery/charging test plus replacing worn terminals can be a cleaner long-term solution than cleaning the same posts every few weeks.